

Estimated reading time: 3 minutes
Running a business requires processes within its internal operations. These business processes (workflows) dictate how work is done, steps in a process, and predictable outcomes. Businesses use flowcharting to help them document those process steps.
Flowcharting is one of the Seven Management Tools for Quality Management.
Flowcharting is typically used to map a process flow showing the beginning of a process, decision points, and the end of the process.
The business function of process improvement utilizes this tool to find redundant or unnecessary steps in a process that improve the process efficiency when eliminated.
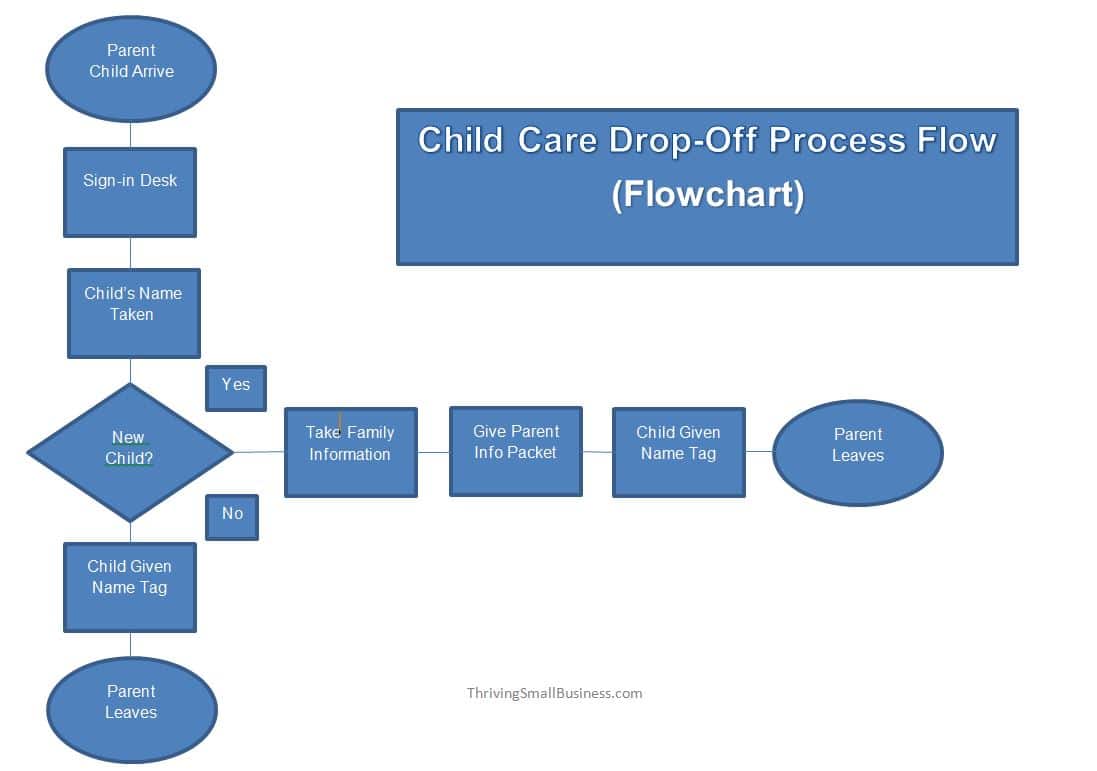
Let’s look at an example. Let’s say you operate a childcare business. Your business has a consistent census of families. However, new families are encouraged to utilize your services to check them out.
A process flow will show how parents are registered, and children are admitted to the daycare center.
1. Identify Steps to the Process
The first step in creating a flow chart is to identify all the steps in a process.
To begin, gather a team of people who are familiar with the process that will be flowcharted.


In our example of a childcare business, your team would include childcare workers, the receptionist, and the facility director.
Talk through the check-in process with the team. Discuss what works, what steps slow the process down, and team ideas for a streamlined process.
Ask everyone in the group to write individual steps to the process on Post-it notes.
2. Flip Chart Post-it Notes
Now, gather the group and ask them to place their post-it notes on a piece of flip chart paper and hang them on the wall.
Review the Post-it notes. Next, take all of the steps and put them in the order of the process. At decision points, branch the columns to reflect decision processes.
For instance, a decision point in our example is when the question is answered if the child is a new or existing family.
3. Create A Draft Of The Flowchart
Take the flip chart and use a computer program to create the process for print.
Visio is the most common flowchart software, but Microsoft Word also has a program that works.
Create the starting point, decision points, and the ending point in the process. Do this by inserting shapes and arrows to provide a visual of the process flow.

4. Review The Draft Flowchart
Once the flowchart is drawn on paper, reconvene your team and review the chart with the process owners.
Discuss the draft to ensure the flowchart accurately represents the process. If steps are missing or redundant, make changes as the team dictates.
5. Next Steps
Now that you have a finalized flowchart, the next step would be to formalize the process.
To do this, have the team develop a communication plan that will formally communicate the process. Next, you will incorporate the new process in training materials for new employee orientation.
Process Improvement
Sometimes defined processes simply don’t work.
If you are getting consistent customer complaints or need to shave some steps from a process, you can use a flowchart to identify those redundancies.
This is an oversimplified example of a flowchart, and obviously, very complex processes are much more in-depth than this.
The key is to start small and get some practice identifying steps and drawing them out. You will soon find yourself drawing most processes you use on a day-to-day basis.